


Fresh herbs have a short window of perfection. One day they’re fragrant, green, and bursting with flavor, and the next they’re limp and fading at the back of the fridge. Drying herbs bridges that gap, turning delicate sprigs into a pantry staple that holds onto their character far longer than you’d expect.
Done well, dried herbs can elevate a dish almost as much as fresh ones, but the trick is knowing how to treat each herb so it keeps its potency rather than becoming a pile of tasteless dust. This guide takes you through the methods that actually work at home, no special equipment required.
How to dry herbs: step-by-step instructions
Drying herbs comes down to two things: remove moisture gently and protect flavor. The exact steps vary by herb type and by method. Start with the prep, then pick the drying method that fits your herb and your kitchen:
-
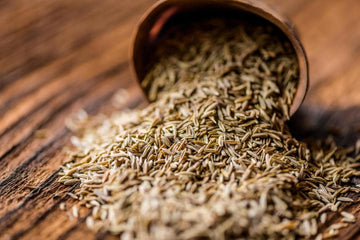
Harvest at the right moment: Pick in late morning after dew has evaporated and before strong midday sun. Choose young, healthy stems with no spots or insect damage. For the fullest flavor, harvest just before the plant flowers.
-
Sort and trim: Discard damaged leaves. For leafy herbs (basil, mint, parsley, cilantro), keep tender stems only. For woody herbs (rosemary, thyme, oregano, sage), keep sprigs intact. Remove thick or bruised stems that dry poorly.
-
Rinse quickly and dry thoroughly: Swish in a bowl of cool water to remove dust. Lift out, do not pour the grit back over the leaves. Pat dry with clean towels, then air-dry on racks or spin gently in a salad spinner. Surface moisture is the enemy of color and aroma.
-
Portion for even drying: Make small bundles the thickness of your thumb for hanging methods, or spread in a single loose layer for tray methods. Crowding traps moisture and leads to browning or mold.
-
Label: Similar herbs can look alike once dried. Label bundles or trays with the herb and date.
Pick a method based on herb type and your conditions

Humidity, temperature, and herb structure matter. Woody herbs tolerate air-drying well. Tender, high-moisture herbs keep more color and aroma with faster, controlled drying.
Air-drying on racks
Use for: rosemary, thyme, oregano, marjoram, sage, lavender, bay.
-
Line mesh racks or cooling racks with parchment.
-
Spread sprigs or leaves in a single layer with gaps between pieces.
-
Place racks in a warm, dry, shaded room with good airflow. A fan on low across, not directly at, the herbs helps. Avoid sun to prevent bleaching and oil loss.
-
Turn leaves every day or two so both sides dry evenly.
-
Drying time ranges from 3 to 10 days. In humid climates it may take longer.
-
Test for doneness: leaves should crumble cleanly and stems should snap, not bend.
-
Move immediately to conditioning (see below).
Hanging bundles in paper (for woody herbs)
Use for: rosemary, thyme, oregano, savory, sage.
-
Tie 6–8 sprigs with cotton string.
-
Slip each bundle into a paper bag with holes punched in it. Label the bag. The bag keeps dust off and catches falling leaves.
-
Hang upside down in a warm, shaded, airy spot.
-
Check every few days. Most bundles dry in 1 to 2 weeks.
-
When stems snap, strip leaves into a bowl and discard tough stems.
Dehydrator (most controlled, best for tender herbs)
Use for: basil, mint, parsley, cilantro, dill, chives, tarragon, lemon balm.
-
Set the dehydrator to 95–105°F (35–40°C) for delicate leaves, up to 115°F (46°C) for sturdier ones.
-
Arrange leaves in a single layer on mesh trays. Avoid overlap.
-
Dry for 1 to 4 hours depending on herb and thickness. Start checking at 60 minutes.
-
Rotate trays if your dehydrator has hot spots.
-
Stop as soon as leaves are crisp. Overdrying dulls color and aroma.
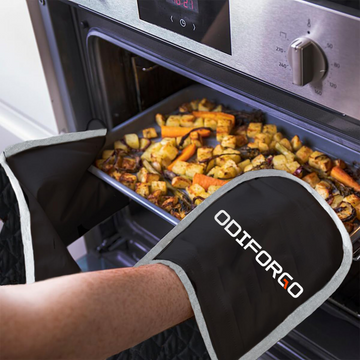
Oven drying, door ajar (works in most kitchens, watch carefully)
Use for: parsley, cilantro, dill, oregano, thyme, sage. Avoid for basil and mint if you want bright color.
-
Set the oven to its lowest temperature, often 170–200°F (75–95°C). If it can go lower, use the lowest setting.
-
Line a sheet with parchment. Spread herbs thinly.
-
Prop the oven door open slightly with a wooden spoon to vent moisture.
-
Dry for 45 to 120 minutes. Flip once halfway. Check every 15 minutes near the end.
-
Remove herbs as soon as they are dry and crisp. Cool on the counter before storing.
Microwave (fast small batches)
Use for: parsley, cilantro, dill, tarragon, mint, chives. Not ideal for woody stems.
-
Place a single layer of leaves between two sheets of paper towel on a microwave-safe plate.
-
Microwave at 50% power for 30 seconds.
-
Check and rotate the plate. Continue in 15–20 second bursts until dry and crisp.
-
Most small batches finish in 60–120 seconds total. Let cool before crumbling.
Window-screen sandwich (good airflow without special gear)
Use for: almost any herb in moderate humidity.
-
Make two food-safe mesh screens or use clean window screens.
-
Spread herbs on one screen, cover with the second to keep dust and pets off.
-
Elevate the sandwich on blocks so air moves above and below.
-
Place in a shaded, breezy location. Turn the sandwich every day.
-
Dry time is similar to rack drying, usually 3–10 days.

Additional notes
Tender, High-Moisture Herbs (basil, mint, cilantro, parsley, dill, tarragon, lemon balm)
-
Prefer dehydrator, microwave, or very low oven.
-
Air-drying can cause blackening or loss of aroma if ambient humidity is high.
-
Strip leaves from thick stems before drying to speed evaporation.
-
For basil, lower temperatures preserve green color. Aim for 95–105°F in a dehydrator.
Woody or Semi-Woody Herbs (rosemary, thyme, oregano, sage, savory, marjoram, bay)
-
Air-drying or hanging yields excellent results.
-
Keep sprigs whole during drying, then strip leaves once crisp.
-
Ovens are fine at the lowest setting if humidity is high or time is short.
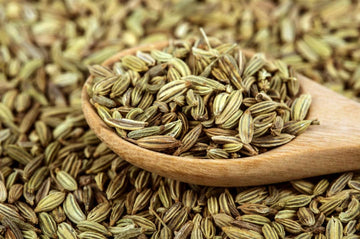
Aromatic Seeds and Flowers (dill heads, fennel fronds, chamomile, lavender)
-
Dry on trays lined with parchment to catch seeds or petals that drop.
-
Keep out of direct sun to preserve volatile oils and color.
Conditioning
Conditioning equalizes moisture so storage stays safe.
-
Loosely pack dried herbs in clean glass jars about three-quarters full.
-
Store for 7 to 10 days at room temperature, shaking the jars daily.
-
Watch for clumping or fogging. If you see condensation or feel soft spots, return herbs to trays for more drying, then repeat conditioning.
-
Once no clumping occurs, move to long-term storage.
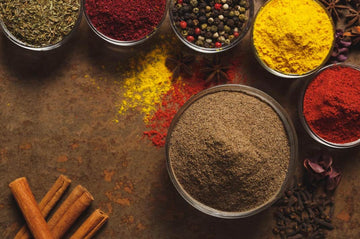
Crumbling and grinding after drying
-
Crumble by hand over a fine mesh sieve for large-leaf herbs. Discard tough stems.
-
Grind only what you need for the next few weeks. Whole leaves hold aroma longer than powder.
-
Pulse, do not run continuously, in a spice grinder to avoid heat buildup that drives off oils.
Quality checks and troubleshooting
-
Doneness test: leaves shatter, stems snap, no pliable spots.
-
Color: should remain close to the fresh hue, slightly muted. Brown or tan suggests too much heat or slow drying.
-
Aroma: should be bright and characteristic. A hay-like smell means lost oils from heat or sun.
-
Case hardening (crisp outside, damp inside): let herbs rest 30 minutes, then break into smaller pieces and dry at a lower temperature.
-
Mold risk: any fuzzy growth or musty smell means discard and start over. Increase airflow and reduce bundle size next time.
Quick reference: method by herb
-
Basil, mint, cilantro, parsley, dill, tarragon: dehydrator low temp, microwave bursts, or oven at the very lowest setting with door ajar.
-
Rosemary, thyme, oregano, sage, marjoram, savory, bay: air-dry racks or hanging bundles; dehydrator optional for speed.
-
Chives: microwave or dehydrator works best. Air-drying often leads to dull color.
-
Lavender, chamomile: tray dry in shade; avoid heat to preserve fragrance.
Food-safe handling and storage prep
-
Clean work surfaces and tools before and after use.
-
Keep pets and dust away during drying.
-
Use breathable materials during drying, airtight only after herbs are fully dry and conditioned.
-
Store in airtight glass in a cool, dark cupboard. Light and heat strip flavor.
This sequence lets you match herb to method, control moisture removal, and lock in aroma. The result is a pantry of dried herbs that taste like what you grew or bought, not like stale dust.
How to store herbs
Once herbs are dried and ground, how you store them determines how long they retain their flavor and aroma. The biggest enemies of dried herbs are light, heat, air, and moisture. Keeping these factors under control ensures that the hard work of drying and grinding pays off with herbs that remain fragrant and potent for months.
The best storage option is airtight containers, preferably glass jars with tight-fitting lids. Plastic tends to absorb odors and can sometimes let air leak in, which shortens shelf life. Glass, on the other hand, is non-porous and helps preserve the natural oils in the herbs. If you can find dark-tinted jars, those work even better because they block sunlight, which can quickly fade color and flavor.
Where you place these jars matters just as much as the container itself. Many people instinctively store herbs above the stove, but the constant heat and humidity in that area cause herbs to lose their strength faster. A cool, dry cupboard away from direct sunlight is ideal. If you want to extend the freshness even longer, you can store whole dried herbs in the freezer. When properly sealed, frozen herbs resist humidity and degradation, although it’s usually best to grind them only after thawing small portions.
Keeping herbs whole for as long as possible also makes a noticeable difference. Whole leaves and sprigs hold onto their essential oils far longer than ground powders. This is why it’s a good practice to grind herbs only in small batches—enough for a few weeks to a couple of months—while keeping the rest of your dried harvest intact. That way, when you do need more, you’ll always be grinding from a stash that’s still full of flavor.
Lastly, labeling is a small but crucial habit. Even if you think you’ll remember what’s in the jar, herbs can start to look surprisingly similar once dried. Write the herb’s name and the date of drying or grinding on each container. This not only prevents mix-ups but also helps you keep track of freshness, ensuring that you cycle through your herbs while they’re still at their best.
Preserving flavor correctly
Drying herbs is one of those quiet kitchen rituals that rewards patience with lasting flavor. Whether you’ve used the gentle air-drying method, the efficiency of an oven, or the precision of a dehydrator, the process is ultimately about capturing the essence of fresh herbs so they can continue to elevate your cooking long after the garden has faded. Grinding and proper storage only refine that process, ensuring every pinch releases the aroma and taste you expect.
At its core, drying herbs is less about preservation and more about extending a connection to fresh, vibrant ingredients. With the right care, a simple sprig of rosemary or handful of basil leaves can remain a powerful flavor in your kitchen for months, reminding you that the harvest never truly ends.