

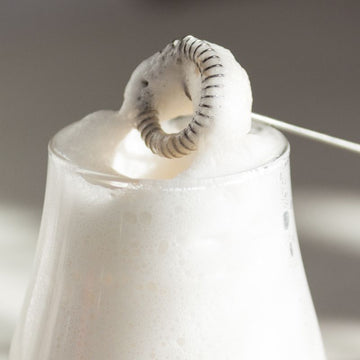

Whether you’re crafting a silky latte or topping off a cappuccino, perfectly frothed milk is what takes your coffee from average to barista-level. The good news? You don’t need a fancy machine to make it happen. With the right technique—and a little creativity—you can froth milk like a pro, right at home.
In this guide, we’ll walk you through exactly how to froth milk using a frother and explore clever alternatives if you don’t have one. Let's get into the foam!
Frothing with a milk frother
A handheld frother is one of the simplest tools for creating rich, foamy milk at home. Depending on your drink style and foam preference, here are three go-to techniques to try:
Classic foam
Perfect for cappuccinos and drinks that call for thicker foam.
-
Heat your milk to about 150°F (you should be able to touch it but not hold your finger in it).
-
Pour the milk into a tall, narrow container—like a measuring cup or milk frothing pitcher.
-
Insert the frother just below the milk’s surface and turn it on.
-
Froth in small, circular motions, gradually moving the wand up and down to build volume.
-
Stop after 20–30 seconds or once you get a thick layer of foam.
-
Tap the container to settle large bubbles, then swirl before pouring.
Microfoam latte
Designed for lattes and flat whites, where you want creamy milk with a silky texture—not airy foam.
-
Warm your milk just as before—avoid overheating it.
-
Place the frother deeper into the milk, about halfway down.
-
Turn it on and keep it mostly still—don’t introduce too much air.
-
Froth for around 15 seconds or until you see a fine, velvety texture forming.
-
Swirl the milk to break any bubbles and pour gently into your espresso.
Cold froth
Ideal for iced lattes or cold brews—just make sure your frother can handle cold milk (check the instructions!).
-
Pour cold milk into a tall container (non-fat milk froths best cold).
-
Place the frother near the surface and turn it on.
-
Froth for 30–45 seconds, moving the frother slowly up and down to build texture.
-
Stop when you have a light, airy foam.
-
Pour immediately over your cold brew or iced espresso.
Layered foam
Great for macchiatos or drinks where you want distinct milk and foam layers.
-
Warm the milk and pour it into a clear glass or narrow container.
-
Start with the frother at the very bottom to heat and mix the milk thoroughly.
-
After 10–15 seconds, slowly raise the frother closer to the surface to introduce more air.
-
Finish by keeping the frother near the surface for an additional 10 seconds to create a thick foam top.
-
You’ll end up with warm milk at the bottom and dense foam floating on top—perfect for layering into your espresso.
Swirl-and-Froth
Best for beginners or when you’re using a wide cup.:
-
Heat your milk and pour it into a wide coffee mug or bowl.
-
Instead of just keeping the frother still, guide the frother in a spiral pattern around the edge of the cup.
-
After one full circle, dip it slightly deeper to heat the milk and break larger bubbles.
-
Froth for about 25–30 seconds.
-
The spiral motion helps distribute foam evenly and keeps the texture smooth and creamy.
Quick burst
Perfect for a fast, no-fuss morning coffee where you want a light foam.
-
Use slightly less milk and warm it to your preferred temperature.
-
Submerge the frother fully for the first 5 seconds, then bring it just under the surface.
-
Froth for a quick 10–15 seconds only.
-
Swirl and pour—the foam will be lighter and looser, but it’s quick and does the job well.
Frothing without a milk frother

No frother? No problem. You can still get impressively foamy milk using everyday kitchen tools—and maybe even a little arm workout. These clever hacks may not be barista-official, but they’re surprisingly effective.
The Mason jar shake
One of the simplest DIY methods that requires zero tech.
-
Pour warm milk (not hot!) into a mason jar—no more than halfway full.
-
Screw the lid on tightly.
-
Shake vigorously for 30–60 seconds.
-
Remove the lid and microwave the milk (uncovered) for 30 seconds to stabilize the foam.
-
Pour gently, holding back the foam with a spoon, then scoop it on top.
The French press pump
If you have a French press for coffee, it moonlights as a milk frother. This technique makes some of the best at-home microfoam.
-
Heat your milk and pour it into the clean French press.
-
Place the plunger in and pump it up and down quickly.
-
Keep pumping for 20–30 seconds or until you see the milk double in volume.
-
Swirl, let it settle for a few seconds, then pour.
Whisk it real good
Takes a bit more effort but gets the job done.
-
Heat the milk in a saucepan or microwave-safe container.
-
Use a regular wire whisk or balloon whisk and beat vigorously by hand.
-
Whisk in a back-and-forth or circular motion for 30–45 seconds until frothy.
-
You can also use an electric whisk or mixer on low if available.
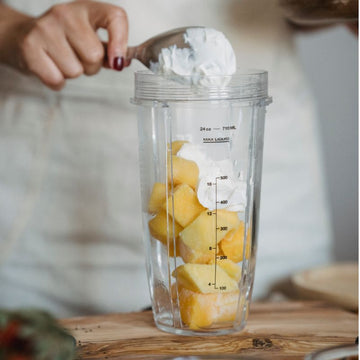
Blender blitz
This method creates lots of foam quickly, though cleanup is a bit more involved. If you are using a standard blender with hot milk, make sure the lid is vented or open slightly to avoid pressure buildup.
-
Warm the milk and pour it into a blender (or use an immersion blender).
-
Blend on medium for 15–30 seconds.
-
Let the foam settle for a few seconds.
-
Swirl and pour carefully to preserve the texture.
The electric mixer
If you’re making a larger batch or frothing for a few people.
-
Heat your milk and pour it into a mixing bowl.
-
Use a handheld electric mixer on low speed to froth the milk.
-
Froth for 20–30 seconds until your desired foam level is reached.
-
Let sit for a few seconds, then pour.
With a little creativity (and a tool or two), you don’t need a frother to make café-style milk foam. Just warm the milk, pick your method, and start frothing.
Wrapping up
Whether you’re crafting the perfect latte or just upgrading your morning brew, knowing how to froth milk opens up a world of coffee possibilities. From frother wands to DIY hacks with mason jars and French presses, the options are as flexible as your taste buds.
Experiment with different methods, try various types of milk, and find the foam style that works for you. Who needs a coffee shop when you’ve got barista-level skills at home?