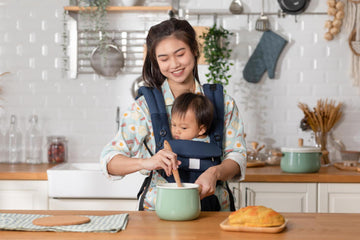
Making your own baby food isn't complicated. It's cheaper than store-bought jars, you control exactly what goes in, and you can adjust textures as your baby grows. Plus, babies who eat homemade food tend to accept more flavors later on.
But here's what stops most parents: they think it takes hours of prep work. Or they worry about nutrition. Or they're not sure which foods are safe at what age.
This guide breaks down everything. You'll learn which ingredients work best for different stages, what equipment actually helps (versus what's just marketing), and get recipes that thousands of parents have already tested. We're talking purees that freeze well, finger foods that won't cause choking, and combinations that actually taste good.
Whether you're starting with a 4-month-old trying their first spoonful or feeding a 10-month-old who wants to self-feed, you'll find what you need here. No special cooking skills required. Just basic kitchen tools, fresh ingredients, and about 30 minutes a week.
Principles of homemade baby food
What's important
Start with single ingredients and wait 3 days between new foods to spot allergies. Once your baby handles individual foods well, start combining them.
Texture changes with age. Smooth purees for 4-6 month olds. Thicker mashes with soft lumps at 6-8 months. Small soft chunks by 9 months. Finger foods around 10 months. Your baby's reaction tells you if you're moving too fast - occasional gagging is normal, but consistent gagging means return to smoother textures.
Fresh produce in season works great, but frozen vegetables often pack more nutrients than fresh ones that traveled for days. Canned foods work if they have no added salt or sugar - just rinse them first. For cooking, steaming beats boiling since it keeps more vitamins. Roasting brings out natural sweetness in vegetables. Even microwaving preserves nutrients well.
What's hard no
Never give honey before 12 months - it can cause infant botulism. Skip cow's milk as a main drink until after one year. No salt or sugar in baby food. Avoid choking hazards like whole grapes, nuts, popcorn, raw carrots, and anything sticky like peanut butter straight from the jar.
For storage, fresh purees last 48 hours in the fridge, 3 months frozen in ice cube trays. Always thaw overnight in the refrigerator, never on the counter. Reheat food once only and toss leftovers.
Don't delay allergenic foods. Research shows introducing peanut butter (thinned out), eggs, fish, and wheat between 4-6 months actually prevents allergies. Just space them out by a few days to identify any reactions.
What you need
You probably own half the tools already. A pot for steaming, a knife, cutting board, and something to puree with. That's your starter kit.
Pureeing options:
-
Regular blender - good for large batches
-
Food processor - handles thick textures better
-
Immersion blender - puree directly in the pot, less cleanup
-
Personal blender - convenient for small portions
-
Manual food mill - total texture control, more effort
Storage containers make or break your meal prep. Ice cube trays are perfect for freezing portions - silicone ones pop out easier than plastic. Small glass jars work for the fridge. Label everything with contents and date. Trust me, frozen sweet potato and frozen butternut squash look identical at 6 AM.
Budget-friendly basics
Under $10 each:
-
Steamer basket (fits any pot)
-
Silicone ice cube trays
-
Metal colander (makeshift steamer)
-
Splatter guard
-
Good vegetable peeler
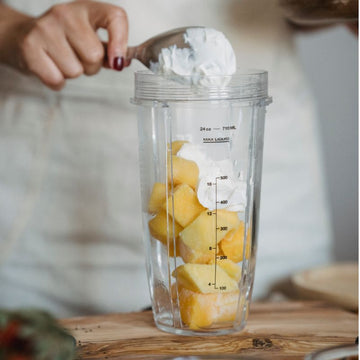
Skip the specialized baby food makers unless you love single-use gadgets. Your regular kitchen equipment does the same job. One tool worth considering: a compact blender that handles small batches. Personal blenders designed for smoothies work perfectly for baby food - they blend small amounts efficiently and the containers often double as storage.
Nice-to-haves include a kitchen scale for tracking portions and extra storage containers. But honestly, whatever blender you already own will work. Buy quality storage containers first, fancy equipment second. You'll make more baby food with reliable storage than with expensive gadgets.
Homemade baby food recipes
First foods (4-6 months)
Start simple. Single ingredients, smooth texture, no seasonings. These recipes make multiple servings - freeze extras in ice cube trays.
Sweet potato puree
-
2 medium sweet potatoes
-
Water or breast milk/formula for thinning
Peel and dice sweet potatoes into 1-inch chunks. Steam for 15 minutes until very soft. Blend with cooking liquid until completely smooth. Add more liquid for thinner consistency. Makes about 2 cups.
Avocado mash
-
1 ripe avocado
-
Breast milk or formula (optional)
Mash avocado with fork until smooth. Thin with milk if needed. Serve immediately - doesn't freeze well. Makes 2-3 servings.
Apple puree
-
4 medium apples (Gala or Fuji work well)
-
1/4 cup water
Peel, core, and chop apples. Cook in saucepan with water for 10 minutes until soft. Blend until smooth. No need to add sugar - apples are naturally sweet. Makes about 2 cups.
Butternut squash puree
-
1 butternut squash
-
Water as needed
Cut squash in half lengthwise, remove seeds. Roast face-down at 400°F for 40 minutes. Scoop out flesh and blend with water until smooth. Roasting brings out natural sweetness. Makes about 3 cups.
Moving to combinations (6-8 months)
Once your baby handles single foods well, start mixing. These combinations are tried-and-true favorites.
Banana oatmeal
-
1/4 cup oats
-
1/2 cup water
-
1/2 banana
Cook oats in water until soft, about 5 minutes. Mash banana and stir into warm oatmeal. Blend if baby prefers smoother texture. Makes 1-2 servings.
Carrot and pea blend
-
2 cups carrots, peeled and chopped
-
1 cup frozen peas
-
Water for steaming
Steam carrots 10 minutes, add peas for last 3 minutes. Blend with cooking water to desired consistency. Bright green color usually interests babies. Makes about 2 cups.
Chicken and sweet potato
-
1/2 cup cooked chicken breast
-
1 cup cooked sweet potato
-
2-3 tablespoons cooking liquid or low-sodium chicken broth
Blend chicken with sweet potato and liquid until smooth. First meat for many babies - the sweet potato helps with taste acceptance. Makes about 1.5 cups.
Pear and spinach
-
2 ripe pears
-
1 cup fresh spinach
-
2 tablespoons water
Peel and chop pears. Steam with spinach for 5 minutes. Blend until smooth. Pears mask the spinach taste completely. Makes about 1.5 cups.

Texture progression (8-10 months)
Leave more texture in purees. Mash instead of blending. Introduce soft finger foods alongside purees.
Beef and vegetable mash
-
1/2 pound ground beef (90% lean)
-
1 cup mixed vegetables (carrots, peas, corn)
-
1 medium potato
-
1/2 cup low-sodium beef broth
Brown beef, breaking into tiny pieces. Steam vegetables and potato until soft. Mash everything together with broth, leaving small soft lumps. Makes about 3 cups.
Salmon and broccoli
-
4 oz cooked salmon
-
1 cup steamed broccoli
-
1 tablespoon olive oil
-
Squeeze of lemon (optional)
Flake salmon, checking carefully for bones. Chop broccoli finely. Mix together with olive oil. Mash lightly if needed. Makes about 1.5 cups.
Lentil dal
-
1/2 cup red lentils
-
1 cup water
-
1/4 teaspoon turmeric
-
1 tablespoon coconut milk
Rinse lentils. Simmer with water and turmeric for 15 minutes until mushy. Stir in coconut milk. Mash lightly. Mild spices help develop adventurous eaters. Makes about 2 cups.
Egg yolk and toast fingers
-
2 egg yolks
-
1 slice whole wheat bread
-
1 teaspoon butter
Scramble egg yolks in butter until just set. Toast bread, remove crusts, cut into strips. Serve eggs with toast fingers for dipping. Makes 1 serving.
Advanced combinations (10-12 months)
Almost table food consistency. Small, soft pieces baby can pick up. More complex flavors.
Mini meatballs
-
1/2 pound ground turkey
-
1/4 cup breadcrumbs
-
1 egg
-
1/4 cup grated zucchini
-
1/4 cup grated carrot
Mix everything together. Roll into marble-sized balls. Bake at 375°F for 15 minutes. Freeze extras on a tray, then store in bags. Makes about 30 mini meatballs.
Veggie frittata bites
-
4 eggs
-
1/4 cup whole milk
-
1/2 cup chopped soft vegetables
-
1/4 cup shredded cheese
Whisk eggs and milk. Add vegetables and cheese. Pour into greased mini muffin tin. Bake at 350°F for 12 minutes. Makes 12 bites.
Fish cakes
-
1 cup cooked white fish, flaked
-
1 cup mashed potato
-
1 egg yolk
-
1 tablespoon chopped parsley
Mix everything together. Form into small patties. Pan-fry in olive oil 2 minutes per side. Makes about 8 small cakes.
Breakfast ideas
Yogurt parfait
-
1/4 cup plain whole milk yogurt
-
2 tablespoons fruit puree
-
1 tablespoon crushed cereal
Layer in small cup. Let baby self-feed with spoon. No honey until after 12 months.
French toast strips
-
1 egg
-
2 tablespoons whole milk
-
1/2 teaspoon cinnamon
-
1 slice bread
Whisk egg, milk, and cinnamon. Dip bread, cook in butter until golden. Cut into strips. Makes 1 serving.
Smoothie bowl
-
1/2 banana
-
1/4 cup berries
-
2 tablespoons yogurt
-
Splash of milk
Blend until thick. Serve in bowl with soft toppings like crushed cereal or small banana pieces.
Snack foods
Baked sweet potato fries
-
1 sweet potato
-
1 teaspoon olive oil
Cut into thick strips. Toss with oil. Bake at 425°F for 20 minutes, flipping once. Cool before serving.
Cheese and vegetable muffins
-
1 cup self-rising flour
-
1 egg
-
1/3 cup milk
-
1/2 cup grated cheese
-
1/2 cup grated vegetables
Mix everything together. Spoon into mini muffin tin. Bake at 375°F for 12 minutes. Makes 12 mini muffins.
Fruit leather
-
2 cups fruit puree
-
1 tablespoon lemon juice
Spread thin on parchment-lined baking sheet. Bake at 140°F for 6 hours. Cut into strips. Store in airtight container.
Troubleshooting common issues

Baby refuses green vegetables: Mix with sweet potato or fruit initially. Gradually increase the green vegetable ratio over time. Repeated exposure works - can take 15 tries before acceptance.
Food too thick after freezing: Frozen food thickens when thawed. Add liquid when reheating - breast milk, formula, or water all work.
Baby wants only sweet foods: Offer vegetables before fruits at meals. Mix vegetables into accepted foods. Keep offering rejected foods without pressure.
Meat purees are grainy: Cook meat in liquid (poach or stew) rather than grilling. Blend with vegetables or grains for smoother texture. A splash of broth helps.
Batch cooking strategies
Sunday prep saves weekday stress. Steam several vegetables at once using a multi-tier steamer or oven roasting. Puree each separately, then freeze in ice cube trays. Mix and match cubes during the week for variety.
Cook grains in bulk - quinoa, rice, oatmeal all freeze well. Portion into ice cube trays. One cube equals about one serving.
Make double batches of family meals and set aside baby's portion before adding salt and strong spices. Mash or chop to appropriate texture.
Label everything with content and date. Use within 3 months for best quality. Keep a list on your freezer of what's inside - cross off as you use items.
Making baby food part of your routine
You've got recipes, storage tips, and equipment advice. Now just start. Pick one recipe this weekend. Make a double batch. See how it goes.
Some weeks you'll batch cook like a champion. Other weeks you'll grab a jar at the store. Both are fine. Your baby won't remember whether their sweet potatoes were homemade. They'll remember feeling fed and loved.
The mess is temporary. The rejected foods are normal. Begin with one simple puree and build from there. Before you know it, your baby will be stealing food off your plate. For now, embrace the sweet potato in your hair and the joy of watching your tiny human discover that bananas are amazing.


