


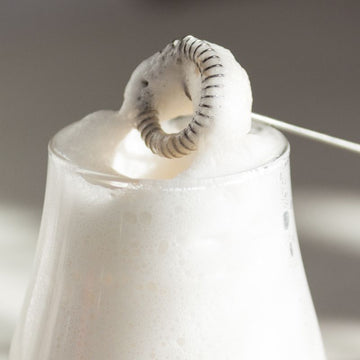


Milk foam is what turns a regular cup of coffee into something that feels a little more special. That light, creamy layer sitting on top of your latte or cappuccino isn't just for looks. It changes the texture, softens the bitterness of espresso, and makes every sip feel smoother.
But getting good milk foam at home can be tricky. Sometimes it's too thin and disappears in seconds. Other times it's stiff and bubbly instead of smooth and velvety. The difference usually comes down to two things: the milk you're using and how you're frothing it.
This article walks you through the best milk options for frothing, the equipment that actually works, and step-by-step methods to get that café-quality foam in your own kitchen. Whether you're working with a steam wand or just a jar and a microwave, there's a way to make it work.
Best milk for milk foam
Not all milk froths the same way. The type you use has a big impact on how thick, creamy, and stable your foam turns out. It comes down to two main things: fat content and protein content. Both play a role, but they do different jobs.
Fat is what gives foam its richness and smooth mouthfeel. Higher fat milk produces foam that feels dense and velvety. Protein is what actually creates the structure. It traps the air bubbles and holds them in place so your foam doesn't collapse the moment it hits your coffee.
Common options

Whole milk is the gold standard for milk foam. It has enough fat to give you that creamy texture and enough protein to hold the foam together. The result is a balanced, microfoam that's smooth, slightly sweet, and holds its shape well. If you're not sure what to use, start here.
2% milk froths almost as well as whole milk but produces a slightly lighter foam. It's a good middle ground if you want decent texture without the heaviness. The foam is a bit more airy, which some people actually prefer for drinks like lattes where you don't want the foam to overpower the coffee.
Skim milk creates the most volume when frothed because of its high protein-to-fat ratio. The bubbles are bigger and the foam is lighter and stiffer. It works well for cappuccinos where you want a thick foam cap, but it lacks the creamy richness that fat brings. The foam also tends to break down faster.
Oat milk is the best non-dairy option for frothing. It has a naturally creamy consistency and enough body to produce stable, smooth foam. Barista editions are specifically formulated to froth better, so grab one of those if you can. Regular oat milk still works but the foam won't be as consistent.
Almond milk is trickier. It's thin and low in protein, which means the foam tends to be watery and falls apart quickly. Barista versions improve things, but even then it won't match dairy or oat milk. If almond is your go-to, keep your expectations realistic.
Soy milk froths reasonably well and produces a decent foam with good structure. The catch is that it can curdle when it hits hot coffee, especially if the coffee is very acidic. Warming it gently before frothing and using a lighter roast coffee helps avoid that.
As a general rule, the fresher and colder the milk is when you start frothing, the better your results will be. Cold milk gives you more time to work with it before it heats up, which means more opportunity to build smooth, even foam. Whatever milk you choose, pull it straight from the fridge right before you start.
How to froth the perfect milk foam
Getting great milk foam isn't complicated, but the method and equipment you use make a real difference. Here's what you need to know.

Equipment
You don't need to spend a fortune to froth milk at home. These are the most common tools that get the job done, from the most effective to the most basic.
-
Steam wand (on an espresso machine) — the professional choice. Gives you the most control over texture and temperature. Produces the smoothest microfoam.
-
Electric milk frother — a standalone device that heats and froths milk automatically. Consistent results with almost no effort.
-
French press — not just for coffee. The plunger mechanism works great for creating foam manually.
-
A jar with a lid — the no-equipment-needed option. It works in a pinch and costs nothing.
-
Now let's get into how to actually use each one.
Using a steam wand
This is how baristas do it, and it gives you the most control over your foam.
-
Fill a metal pitcher with cold milk up to just below the spout. Don't overfill it since the milk will expand.
-
Purge the steam wand by turning it on briefly to clear any water trapped inside.
-
Submerge the tip of the wand just below the surface of the milk, slightly off-center so the milk starts to spin.
-
Turn the steam on fully. Keep the tip near the surface and listen for a gentle hissing sound. This is where air gets pulled into the milk. If it sounds like screaming or loud bubbling, the tip is too high.
-
Once the milk has expanded by about a third, lower the wand deeper into the milk to heat it through and break up any large bubbles.
-
Keep going until the pitcher feels hot to the touch but not burning. You're aiming for around 60 to 65 degrees Celsius or 140 to 150 degrees Fahrenheit.
-
Turn off the steam, remove the pitcher, and give it a firm tap on the counter to pop any remaining surface bubbles. Swirl the milk gently until it looks glossy and smooth like wet paint.
Using an electric milk frother
The most hands-off method. Great for consistency without any technique.
-
Pour cold milk into the frother up to the fill line. Most frothers have a max line for frothing that's lower than the one for just heating.
-
Select the frothing setting. Most devices have options for hot foam, cold foam, or just warming.
-
Press start and let it do its thing. It usually takes about two minutes.
-
Once it's done, swirl the milk gently inside the frother before pouring. This helps smooth out the texture.
Using a French press
A manual method that produces surprisingly good foam.
-
Pour cold milk into the French press, filling it no more than a third of the way. The milk expands a lot with this method.
-
Warm the milk beforehand if you want hot foam.
-
Insert the plunger and pump it up and down vigorously for 20 to 30 seconds.
-
The milk should rise and thicken noticeably. Once it looks foamy and has doubled in volume, stop.
-
Let it sit for a few seconds so the foam separates from the liquid milk underneath. Pour the liquid first, then spoon the foam on top.
Using a jar
The simplest method when you have nothing else available.
-
Pour cold milk into a jar, filling it about a third of the way.
-
Seal the lid tightly.
-
Shake hard for 30 to 45 seconds until the milk is frothy and has expanded.
-
Remove the lid and microwave for 15 to 20 seconds. The heat stabilizes the foam and helps it hold its shape.
-
Spoon the foam onto your coffee.
No matter which method you go with, a few universal tips help. Always start with cold, fresh milk. Avoid reheating or re-frothing milk that's already been steamed since the proteins break down and won't hold air a second time. And if your foam looks bubbly instead of smooth, you're introducing too much air too fast. Slow down and keep the frothing action closer to the surface rather than deep in the milk.
Making milk foam at home is easy
Good milk foam doesn't require barista-level expertise or expensive machines. Whether you're using a steam wand or just shaking milk in a jar, the basics stay the same. Start with the right milk, keep it cold until you're ready, and pay attention to how much air you're adding. That's really all it takes.
Once you get comfortable with the process, it becomes second nature. You'll start noticing the difference between foam that's bubbly and uneven versus foam that's smooth and velvety. And once you know what good foam feels like, you'll be able to make it consistently no matter what method you're using.
The best part is that it makes your coffee at home taste closer to what you'd get at a café, without the cost or the trip. A little practice goes a long way.
FAQs
What's the difference between microfoam and regular foam?
Microfoam is smooth, glossy, and has tiny, uniform bubbles that blend seamlessly into the milk. It's what you want for latte art and silky-textured drinks. Regular foam has larger, more visible bubbles and a stiffer texture. It sits on top of the coffee as a distinct layer rather than mixing in. Microfoam comes from steaming milk with a steam wand and requires more control over air incorporation. Most other frothing methods produce regular foam, which still tastes great but won't pour as smoothly.
Why does my milk foam collapse or separate within a few seconds?
This usually means the foam wasn't stable to begin with. Common causes include overheating the milk, which breaks down the proteins that hold air bubbles in place, or introducing too much air too quickly, which creates large bubbles that pop easily. Using milk that's too low in fat and protein, like thin almond milk or old milk that's past its prime, also leads to weak foam. Start with cold, fresh whole milk or oat milk and froth gently to build smaller, more stable bubbles.
Can you make cold foam or does milk foam always have to be heated?
You can absolutely make cold foam. It's especially popular for iced drinks. The process is the same as hot foam, but you skip the heating step entirely. Cold foam tends to be lighter and airier than hot foam since cold milk doesn't thicken as much. Handheld frothers, French presses, and the jar method all work well for cold foam. Some electric frothers even have a dedicated cold foam setting. Just keep in mind that cold foam doesn't last quite as long as warm foam since heat helps stabilize the bubbles.


